Replacing a joystick console
If your joystick console becomes damaged, it will need to be replaced with a new unit. This is a simple process, but care should be exercised to avoid damaging the delicate pins on the connector.
TetraSkis contain different joystick consoles based on the model number - starting with TS010, the joystick connector was replaced with a quick-release version that streamlines the process. Make sure you follow the correct instruction set for your ski model.
How to Replace the Joystick Console
(1) Begin by following the instructions for powering down your batteries.
(2) Release the retention pin and elevate the ski into lift loading position, then tilt it forward onto the footrest. This will make it easier to access the connector on the rear of the control box.

(3) Remove the joystick console from the armrest by loosening the knob and sliding the joystick out of the T-track. Place it in the seat bucket.
(4) Unclip the cable from any cable clips on the seat bucket. Take note of how the cable is routed through the rear frame.
(5) Two options based on model:
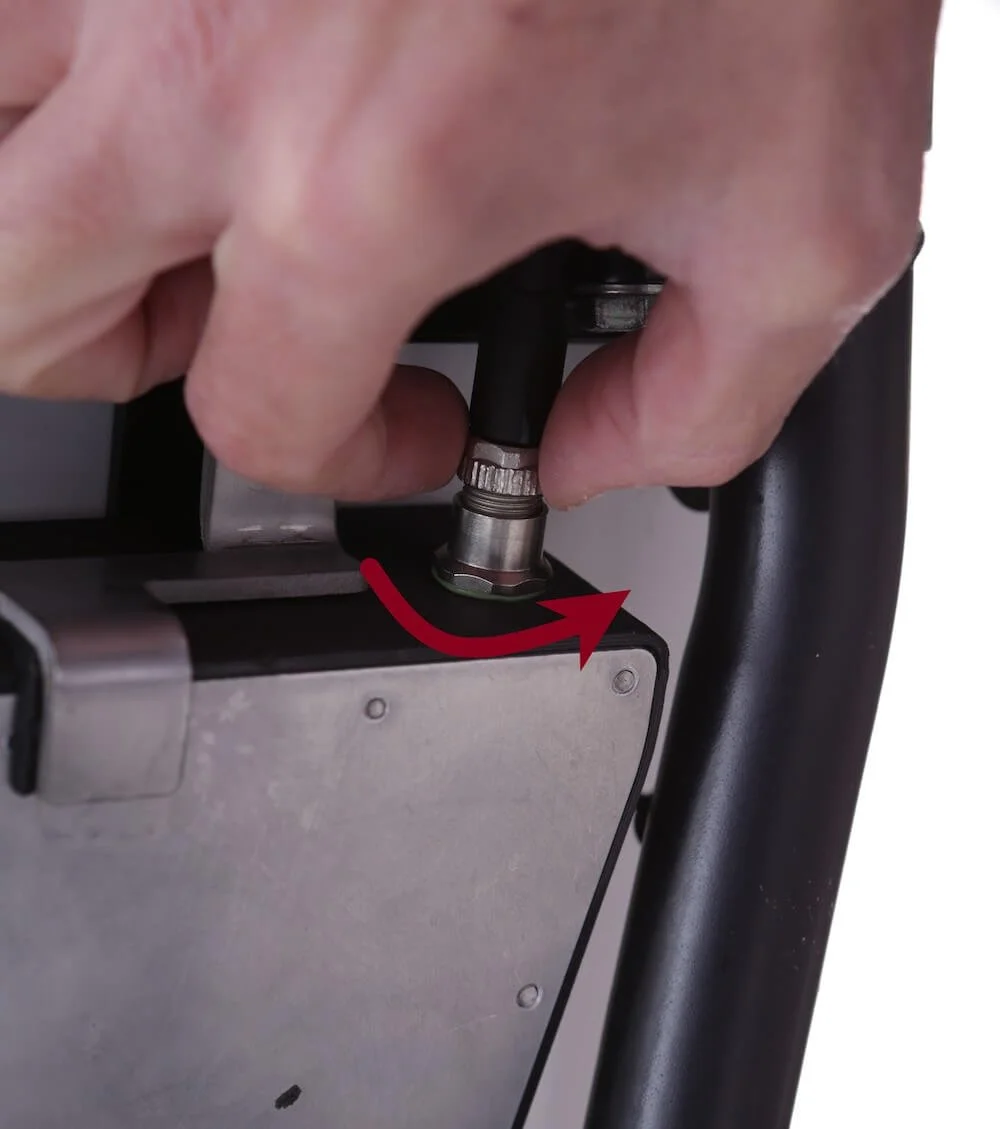
OLD MODEL (Gray Cable) - The joystick connector mates with the control box via a threaded silver connector on the back left of the box. It unplugs via loosening the textured collar and unscrewing it from the panel receptacle. You may need to loosely grip the collar with pliers to get it started. While unscrewing, it helps to lightly wiggle the connector back and forth to help it along.
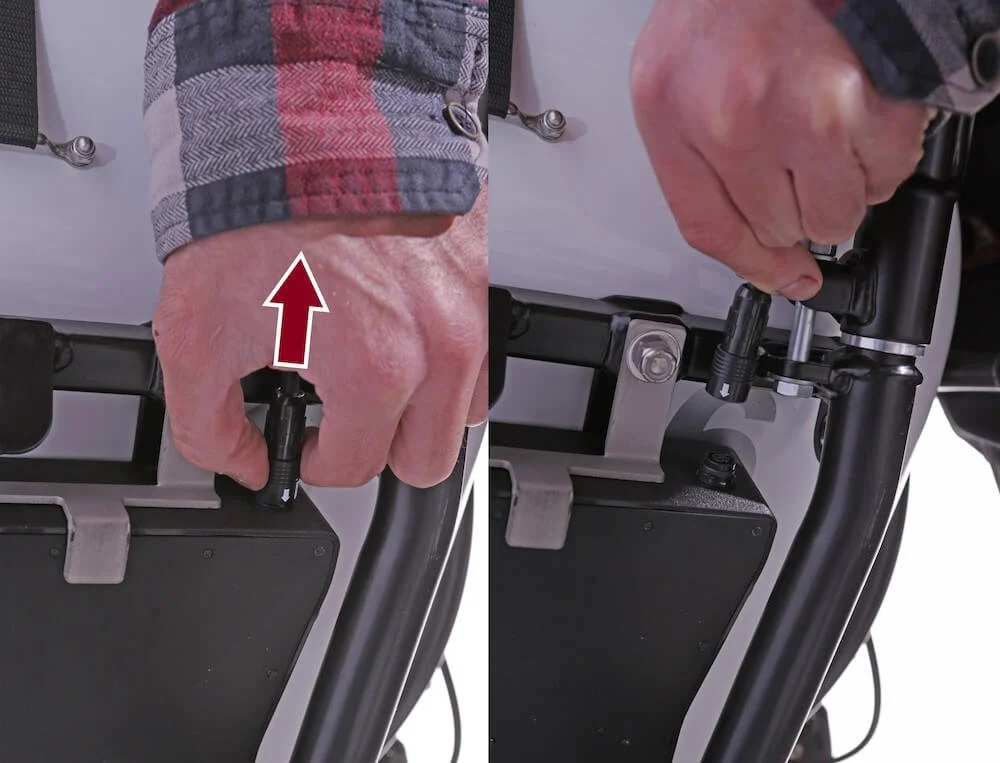
NEW MODEL (Black Cable) - The joystick connector mates with the control box via a black quick-release connector. It unplugs via pulling the ridged collar outward. The connector should unplug easily, do not apply excessive force.
(6) Once all the way unscrewed, the connector should pull out of the receptacle. At this point, you can remove the whole joystick assembly from the TetraSki. Note the way the cable routes through the rear of the frame.
(7) Get your replacement joystick ready, and route the cable through the frame the same way the previous one was. The cable should run between the seatback and rear frame bars, and then under the seat bottom to the receptacle.
(8) The connector is polarized and should only go into the receptacle in the correct orientation. Line it up and apply gentle pressure while turning it until it seats properly (it should be obvious when it goes in correctly). You may have to turn it up to 180 degrees in either direction. Do not apply excessive force or attempt to jam it in - the pins are delicate and can bend or break easily.
(9) Two options based on connector:
OLD CONNECTOR - Once seated, use your fingers to screw the threaded collar into place. Again, it will help to gently wiggle the connector back and forth to keep it turning easily.
NEW CONNECTOR - Once oriented correctly, the connector should push into place and lock with an audible click.
(10) OLD CONNECTOR ONLY - After getting it finger tight, finish with additional torque from pliers until it’s obvious the connector is tight. Do not overtighten or squeeze the connector too hard or it can become damaged.
(11) Reinsert the joystick into the armrest and secure the cable to the seat using the cable clips.
(12) Follow the instructions for powering the batteries back on, and make sure the ski boots up successfully and joystick motion moves the actuators.
(13) Calibrate the new joystick to the TetraSki by following these instructions.