Replacing an actuator
If an actuator becomes damaged, it will need to be replaced with a new functioning unit. This process requires specific tools and components (some of which are supplied with the new actuator), so begin by checking over the tool list below to make sure you have everything necessary.
It is highly recommended that the person performing this procedure has experience with equipment maintenance and some basic mechanics skills
Required Materials
1x - Replacement Actuator
2x - 3/16-inch x 5/8-inch shoulder bolts (supplied with replacement kit)
2x - 8-32 locknuts (supplied with replacement kit)
4x - #8 washers (supplied with replacement kit)
2x - Nylon zipties (supplied with replacement kit)
1x - Loctite RED or other high-strength threadlocker
Required Tools
1/4-inch Torque wrench (click type recommended)
11/32-inch Socket
3 inch or longer socket extension
3/32-inch L-shaped Allen key
Wire snips
Replace the Actuator
(1) Before attaching the new actuator, make sure it works properly. With the ski powered off, unplug the broken actuator by turning the twist-lock connector counter clockwise until it spins freely, then pull the connector out of the socket. Plug the new one in (the connectors are polarized and only insert in the correct orientation) and turn the ski on. Move the joystick and make sure the new actuator extends and retracts fully. It may briefly run in to the end stops before it is calibrated, but should return to the same center position everytime.
(2) It will help to elevate the ski into the loading height for this procedure.
(3) Using the 3/32” allen key and 11/32” socket/extension, remove the broken actuator that is attached to the ski. The inner connecting bolt will require tilting the TetraSki forwards onto the footrest to access. Try to remember where the washers go (the washers should always sandwich the black tabs on the frame).
(4) Insert the new outside screw and washer into the hole on the ski pivot arm.
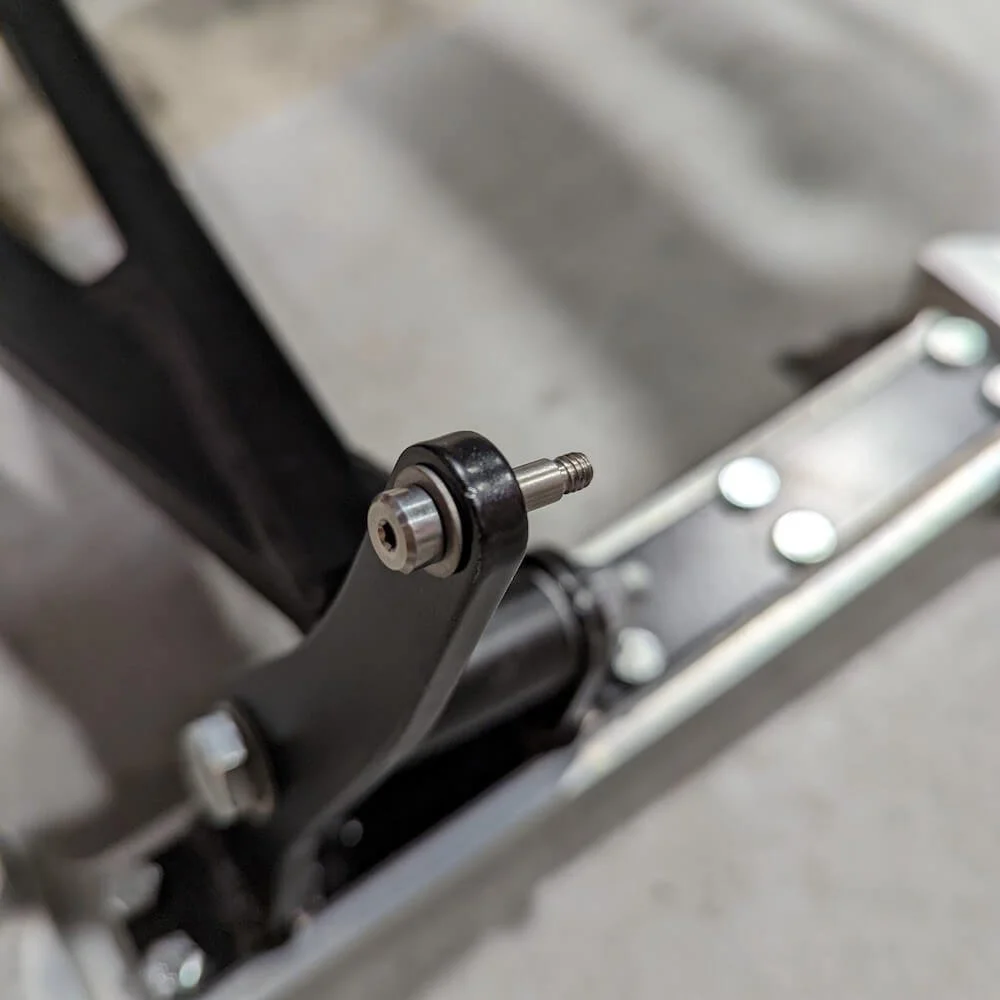
(5) Add another washer to the other side, then the actuator end.
(6) Apply some low strength thread locker, and then tighten the nut to finger tight.

(7) Tighten the nut using a torque wrench to 4N-m (35 in-lb).
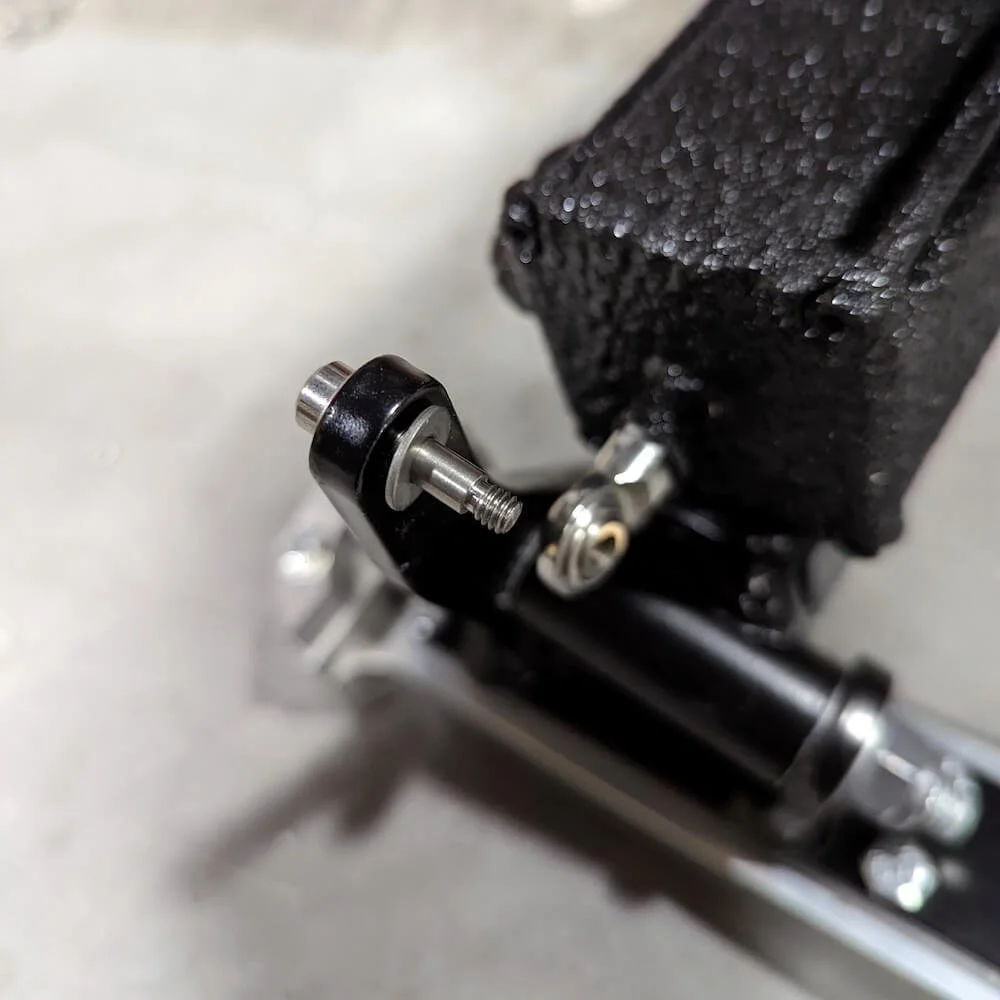
(8) Insert the inside screw through the inside actuator end, and then add a washer to the other side.
(9) Insert the screw through the top of the inside actuator tab.

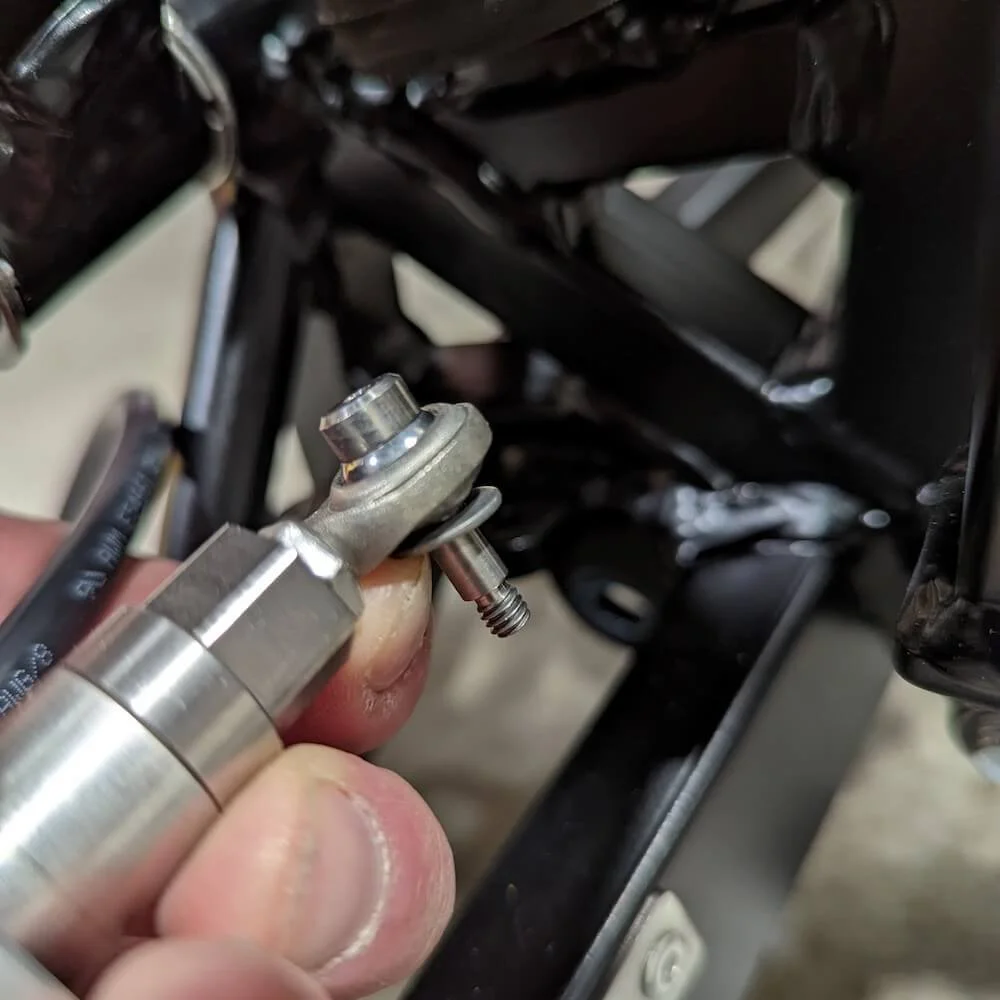
(10) Tip the ski forward so it’s balanced on the footrest.
(11) Add another washer to the bottom of the black tab, and then add a drop of high-strength threadlocker.

(12) Thread the nut onto the screw and tighten using a socket extension on the torque wrench to 35 in-lb (4 Nm). Make sure the washer is centered on the screw and sits flush against the frame tab.
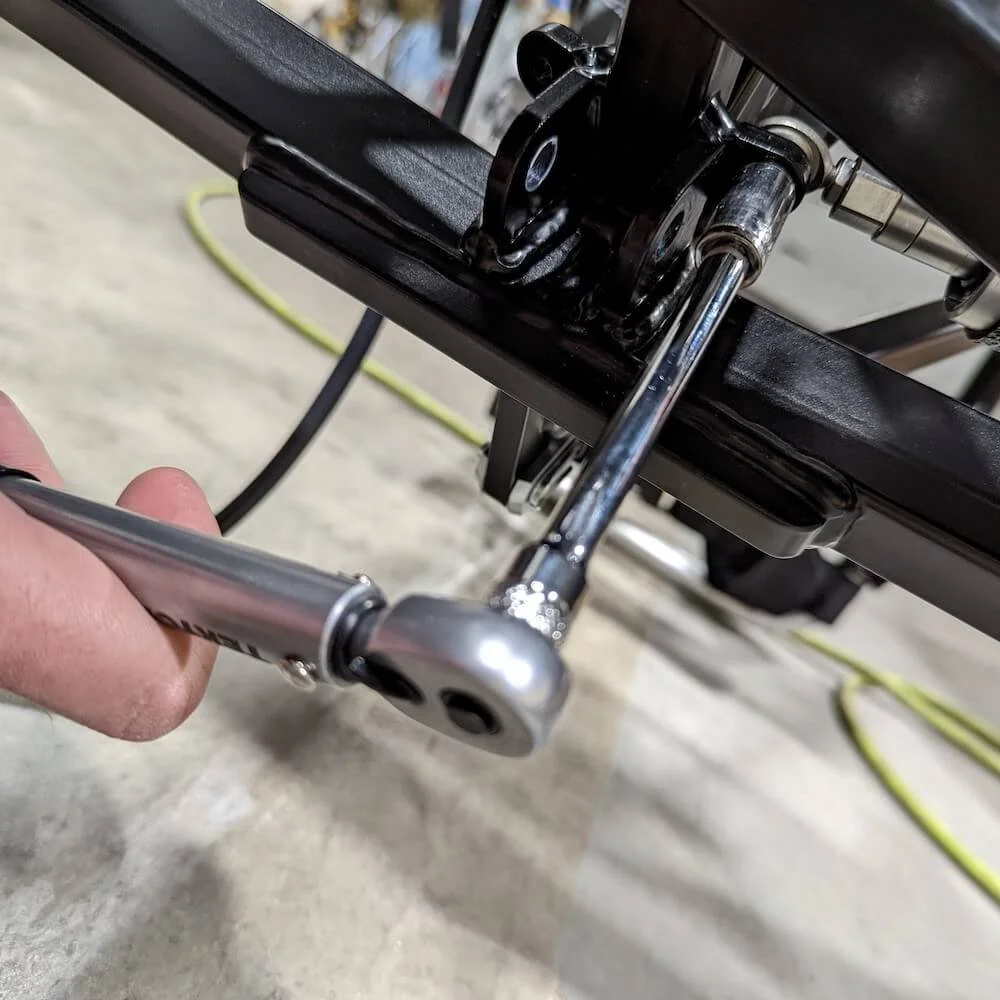
(13) The actuator should now be firmly attached to the ski (it will be able to swivel but there shouldn’t be any up/down or side to side play).
(14) Route the cables as shown below and add cable ties where you see them in the picture. (This picture below is taken from the back of the ski).

(15) The actuator installation is now complete. You will now want to recalibrate the ski to the new actuator. Follow the instructions for calibrating the actuators.