Replacing a control box
Replacing a control box is a relatively straightforward process, but there are a few tricks to make the process easier. When your new box arrives from Tetradapt, follow these steps to swap it out with the old one. The bolts that hold the control box in place also secure the seat to the frame.
Required Materials:
1x - Replacement Control Box
Required Tools:
1/2-inch Socket or Wrench
3/16-inch Allen Key
Remove the control box
(1) This process requires the TetraSki to be elevated in the chair loading position. Raise the ski to this position, remove the seating pad, and tilt the ski forward so it is leaning on the footrest.
(2) Unplug the actuators by turning the twist-lock mechanism and pulling the cables out of the socket.
(3) Unplug the joystick via loosening the textured collar and unscrewing it from the panel receptacle. You may need to loosely grip the collar with pliers to get it started.

(4) Unplug the sip-and-puff tubing by pushing up the metal tab on the receptacle and pulling the quick-connector out.
(5) Using the 1/2” socket and a 3/16” allen key, loosen (but do not remove) the nuts on the front bolts, until they are barely threaded on.

(6) Loosen (but do not remove) the nuts supporting the rear bracket until they are barely threaded on. The box should loosely hang on its own at this point.
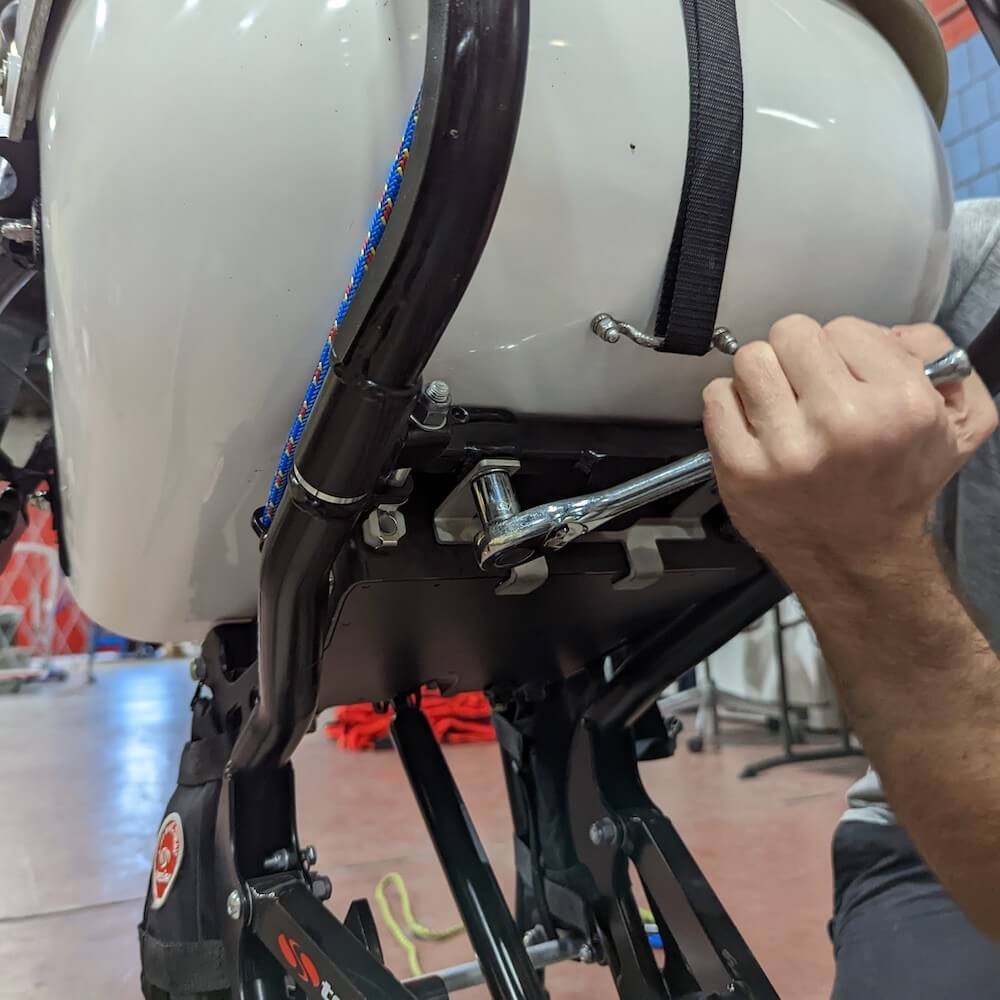
(7) While supporting the box underneath with one hand, use the other hand to fully loosen and remove the rear nuts, and then remove the rear bracket. (See image below)
(8) Remove the box by tilting it down while sliding it backwards. The front bolt/nut/spacer assembly should stay on the ski through this process. (See image below)

Install the new control box
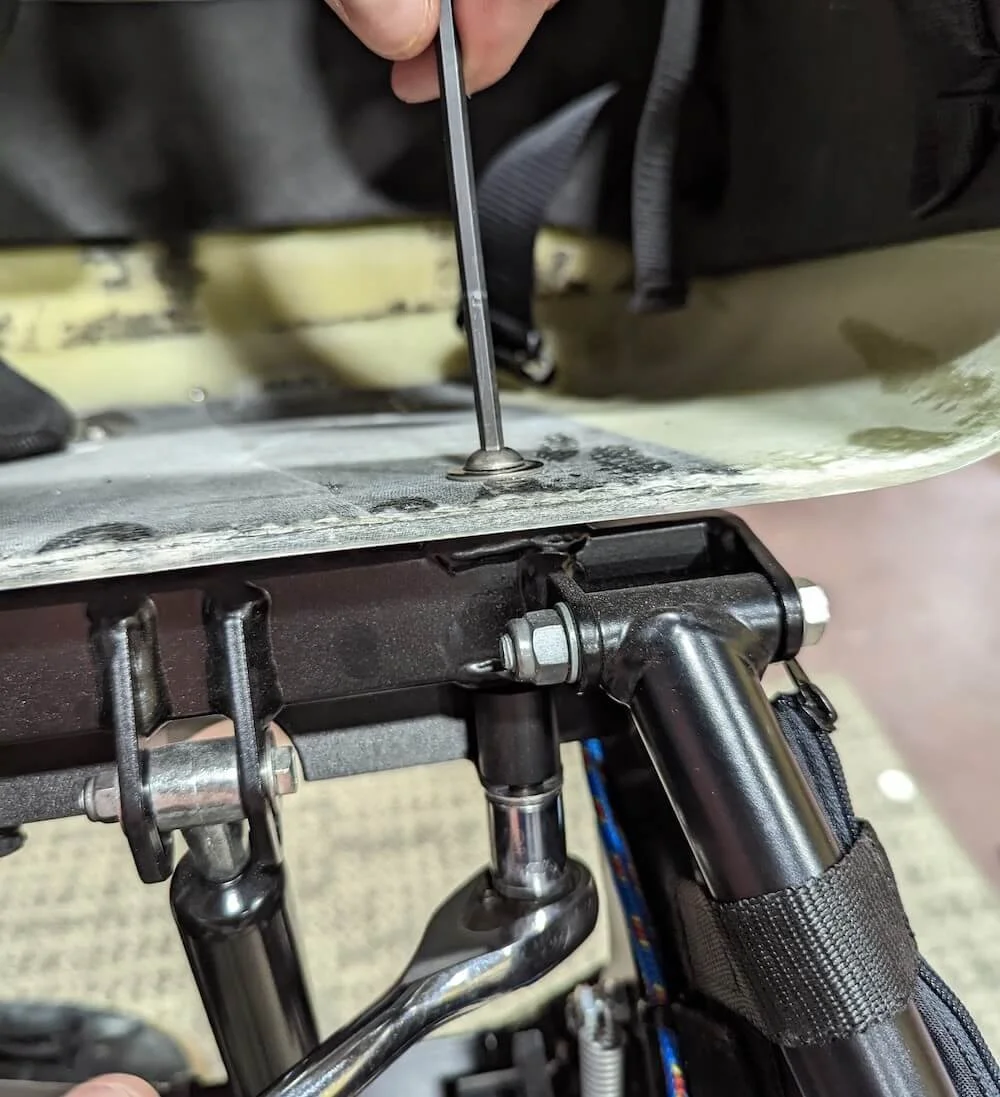
(1) Keep the rear bracket, nuts, and washers handy and within arms reach. Make sure the rear bolts are pressed entirely through the seat/frame and sticking out of the bottom of the frame as far as possible.
(2) Slide the new box into the front bolt/spacer assembly, making sure the forks on the box go between the black spacers and the washers.

(3) While supporting the box with one hand, carefully position the bracket over the rear bolts. You should now be able to hold the box and bracket in place with one hand.

(4) Using the other hand, and one side at a time, carefully slip a washer over the bolts, and loosely thread on the nuts. At this point you should be able to let go of the assembly and it will hang in place on its own.
(5) Using the 1/2” socket and 3/16” allen key, begin to tighten the rear bolts. Stop just after the rear bracket begins to tighten into place.
(6) Using the socket driver or a small hammer, tap the bracket forward until it is contacting the box. Bolt tightness here is key: the bracket should be tight enough that friction holds it in place after tapping it forward, but loose enough that it can be moved into place.

(7) With the rear bracket in place, finish tightening the rear bolts to 20 N-m (15 ft-lbs) (torque isn’t critical, just get them pretty tight).
(8) Tighten the front bolts to 20 N-m (15 ft-lbs).
(9) Plug the actuators back into the sockets, making sure the left cable goes to the left sockets and vice versa. Make sure the twist-lock collars are fully tightened and the cables are locked in place.
(10) Plug in the joystick. The connector is polarized and should only go into the receptacle in the correct orientation. Line it up and apply gentle pressure while turning it until it seats properly (it should be obvious when it goes in correctly). You may have to turn it up to 180 degrees in either direction. Do not apply excessive force or attempt to jam it in - the pins are delicate and can bend or break easily.
(11) Once seated, use your fingers to screw the threaded collar into place. Again, it will help to gently wiggle the connector back and forth to keep it turning easily.
(12) After getting it finger tight, finish with additional torque from pliers until it’s obvious the connector is tight. Do not overtighten or squeeze the connector too hard or it can become damaged.
(13) Plug the quick-connector for the sip-and-puff line into the receptacle.
(14) Run a calibration routine on both and actuators and joystick to program the box to the other hardware on the ski.